link to main site

link to main site
This is my old site now. Click here for the new one!

Wednesday 10 December 2014

Sketches - Artists helping artists

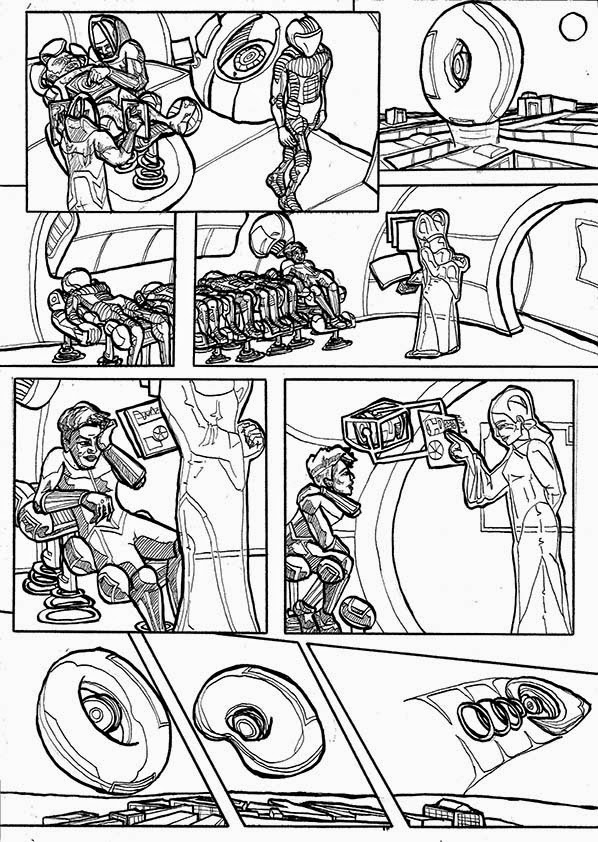
I thought I should do a bit of practice done, so I went looking for some useful hands and face references.

This hands piece is from a guy on Deviantart called CoranKizerStone.
 This  expressions piece is from another Deviantart user, Shingworks.


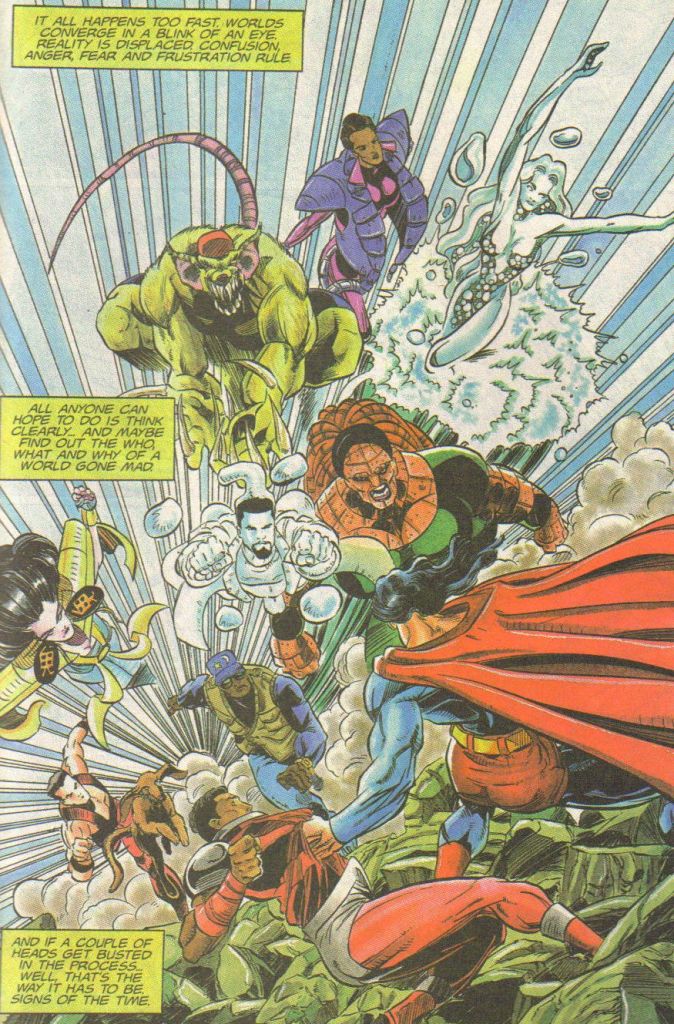
I found these on the Pinterest board of Americantuff he us artist Chriscross. If you don't already know his work, whether it's from his runs on Blood syndicate and Heroes for Milestone, Captain Marvel for, well, Marvel, either Xero or his current work on Katana for DC (which I''ll be picking up on my next trip to my comic shop), you owe it to yourself to familiarise yourself with him.

One of Chris's  biggest strengths (among many) is the emotional expression and storytelling he gets into his work, especially through facial expression. Seriously, I aspire to be half as good at that, and seeing some of the stuff he uses to practice is a great insight, and something I plan to make use of. Here are some examples of his work, starting with the Blood Syndicate about to wail on mullet-Superman.
©2014 James Mathurin

Monday 8 December 2014

Acquisition, Page 8, Inks

Trying to get what will be the final page of my Acquisition comic finished before I head back to the UK for Christmas (which will cause a bit of a break in my posting, though I'll get some different stuff on in the meantime).

These are the inks (on their own, and with all the layers underneath), before I add the shades and words.


©2014 James Mathurin

Friday 28 November 2014

Acquisition, Page 8 pencils

I realised I haven't posted much lately, so here's the beginnings of the final page of my Acquisition story.
I intended this to be a learning experience, and one of the things I've learned is that there is wisdom in spreading your story out over more pages. I had headaches over the layout, but I'm glad I finally found an arrangement that worked.


I got the rough layout done, before I had one of those annoying 'should have thought of that sooner' moments, when I realised I had no idea what the doctors, who I only scripted for one panel, looked like. 

In the end, I came up with a kind of hazmat-looking outfit for them, then I could get going.
I did my rough pencils, and made the rooms less boxy, to differentiate from the other architecture.
So, then I just had to finish the pencils (and, just to be able to see them, I also removed the orange in the picture at the top).
©2014 James Mathurin

Saturday 25 October 2014

Art Tutorial - Page 2 of 'A supervillain in the woods'

I've been enjoying this.

So, just for a reminder of what this is:

We set ourselves a little project, which was to do a page of comic art from the same idea. The kids chose what it would be:
-Who? A villain;
-Were? In the woods;
-Doing what? Finding a cave.
As I've already shared, I came up with this insect-woman, Entomon, as my villain, and her giant Firefly assistant, Cole. I had a lot of fun doing it, and the children were interested in seeing more (I think they were slightly disappointed I returned to Acquisition, rather than doing more of this), so here is Page 2.


For this to be a tutorial, I thought I should do at least a couple of things differently, so one of the things  I did differently was to sketch out the page in advance, and worked out roughly what the dialogue would be, and how I'd lay out the characters and speech bubbles. If you can make out my writing, you can see that most of the dialogue stays the same, but I made some changes. Also, in doing the sketches, I realised I really needed to research the new bugs I was adding.


When I started my actual drawing, another change was to try something that I read as advice a while back: Don't put the panel borders in straight away. It seemed to work for me, and I think kept me a bit freer working as I developed the further stages. Still, what we have is the basic stick-figures that are showing what is happening, which I still insist is a stage anybody can do. Again, I've used a coloured pencil, so that it will get in the way less when I'm working on later stages.
Then it develops to the more detailed roughs, still using the coloured pencil, so that I can quickly change and adjust anything that needs it, and I've given myself a clear basis for the detailed pencils to follow. Also, I put in the panel borders at the end of this work.
.
Next, the detailed pencilling. I've put this in two stages, how it looked with the orange pencils underneath, and a version with the orange removed to show what I actually drew.
After that, I added the first layer of inks. It clears up the lines, but still lacks a bit of definition, with the bottom left panel being a bit unclear still.

Using a thicker ink pen, I think I've succeeded in making the figures stand out better from each other, and generally add definition.
From there, I added shading, which was very important for this page, as it is set inside a dark cave, and some of the details in the art don't make as much sense without that necessary darkness.

After that, I just had to add the dialogue, with a couple of minor changes (the third panel was so big, it was just asking for at least one more speech bubble than I'd originally planned). I also changed the positioning of some bubbles from the sketch, so as to not hide any important areas of art.


©2014 James Mathurin

Friday 10 October 2014

Some insect sketches

So, I'm carrying on with the Entomon comic I started with my comics group, and that will require some more bugs (I would say insects, but I really wanted to include a Millipede, and that would just be scientifically inaccurate). Not all of these will be used straight away, but I'll be trying to work them in.

Seeing as this is part of my tutorial series, I will simply say this: If you're drawing something for the first time, do your research and sketching. Even if you don't end up with perfect copies, you'll pick up on little details that will make it look much more interesting, and will help you if you have to make up a fictional version.


Millipede:

Beetle and Mantis (this is actually an old one that I seem to have never scanned before):


©2014 James Mathurin

Thursday 25 September 2014

Acquisition, Page 7

So, after finishing the stuff I'd been doing with my comics group, I went back to the unfinished Page 7 of Acquisition. So, here it is, shaded and lettered.


©2014 James Mathurin

Sunday 21 September 2014

Art Tutorial - A supervillain in the woods

So, following on from this post, where I showed Entomon, a supervillain I'd created as part of a task I'd done with the children in my comics / cartooning group.

We set ourselves a little project, which was to do a page of comic art from the same idea. The kids chose what it would be:
-Who? A villain;
-Were? In the woods;
-Doing what? Finding a cave.
Some of the children have come up with some great ideas, which I'm looking forward to seeing, but here is mine:
Here are the stages I went through to reach it. First I sketched out the frames , figures and where the speech bubbles will go, with a soft, coloured pencil:

Next I added some details to the figures and scenery, and make changes where necessary (like moving Entomon from the centre to the right of the 3rd frame, to allow the cave to be viewed better, and to leave room for speech bubbles:

Then I switched to a drawing pencil to do detailed and shaded art:

After pencils, I switch to ink to define the lines better:

Then ink outlines with a thicker pen, to make the objects stand out from each other better:

The next stage, I did on Photoshop, but can be done by hand, or by other means, but it was me colouring (or, working in grayscale, shading):

Finally, as I showed above, I added the text and speech bubbles:

©2014 James Mathurin

Wednesday 17 September 2014

Supervillain Tutorial Part 2.


These are rough sketches for the villain comic i did with my comics group. I'm going to be putting up the finished page, but before I do, there were a couple of development sketches.

None of the frames in the comic show a closeup on Entomon's staff, but I did design it in a bit of detail, with a Praying Mantis motif, which I thought had some interesting subtext to a female villain. 
This is the very first rough sketch of Entomon, which I thought was a little too generic, so I tried to make more insect-y. The main thing here is the rough layout sketch of the page, where I arranged the frames, and what was going on in each one. I thought it was important to include this, as some of the children seem nervous about getting it right first time, and as you can see, this was just a very rough sketch, where I could make mistakes and rearrange stuff before I properly got started, as well as do practice dialogue.


©2014 James Mathurin

Thursday 11 September 2014

Art tutorial - faces

Following on from the figures tutorial I did for my comics / cartooning group on figures, I thought I'd do another one, this time focusing on faces. Again, I was using a character that I've been sketching for Vic at Hazardous productions.

The first stage was to just get the shape of the head. Some people's heads are rounder, some are squarer, some longer, etc. Using a soft, coloured pencil, also add guidelines - halfway down for the eyes, halfway down from there for the nose, and halfway from there for the mouth.
Next I added more basic details - the neck, the hairline, the mouth and nose (with an indication of the shape - narrow, broad, pointy, etc.), the eyes and the shape of the jawline.
After that, more details. First of all eyebrows! Eyebrows are surprisingly important for showing emotion (test this: draw a smiling face a few times, and add different eyebrows. You'll get at least one delighted person, one crafty person, and one who looks like they're going to mug you). Also, the shape of the mouth, and hairstyle. If the distinctive hairstyle didn't cover the ears, I'd have drawn them, level with the eyes.
Now, switching to a harder drawing pencil, I do more detailed lines, making the features clearer, and adding shading.
Then, using an ink pen, I go over the lines to give them clearer definition.

©2014 James Mathurin

Wednesday 3 September 2014

Art tutorial - figures

Another series of pictures that I used in my comics group. Before we started working on our supervillain idea, I was using these sketches that I did for Vic at Hazardous Publications.

The point of these was to illustrate a principle I had talked about with my group: If you can do stick-people, you can do a comic. I'm not the first to realise this; Randall Munroe has been putting that lesson to good use for years now. Basically, I say stickmen can make a comic, and any of the later stages you can get with practice.

  • So, the first step is the one I think anyone can do - stick-people laying out the poses. This is the stage where it's easiest to fix anything you're not happy with. Check the poses, etc. At this stage I was using a blue colouring pencil, as it is easier to ignore and delete these lines once proper pencils and inks are used later.
  • This stage is still a basic one - make all the sticks into solid body-parts, put in the rough lines for the face, and add in the rough details of things like fingers.
  • Next, you add the rough surface details- hair, clothes, distinctive skin marks (hair, tattoos, etc). This stage is probably the last one where you can make big changes. You can see I've done that with the figure far left, whose pose wasn't working for me, and who would have been too difficult to change after the clothing and other details had been added.
  • Next, I went to a 2B drawing pencil, which allowed me to draw more detailed pencil art over the rougher blue lines. This lets me add a bit of texture, detail and shade, and just generally be a bit more precise.
  • Next, I switched to a thin black ink pen to reinforce the pencils, and make the lines clearer.
  • Finally, I used a thicker pen to go around the edges of objects, which helped to differentiate lines that show texture and shade, and lines that show shape.

©2014 James Mathurin